Hexo Re
0. Intro
For some reasons(see the blog yourself), I wanted to start my personal blog. The requirements of the blogger platform are: easy maintenance(including deployment and easy fee), and allowing custom configurations(themes, domain, font, etc.). In order to meet these requirements as well as to be cool, I finally chose Hexo, a .js based static website generator.
why Hexo
About the website, I first thought of flasks, as it can do most of the job if you code it properly. However, coding stuffs is time consuming when it comes to make something elegant from scratch. Although there was a good and open-source one on GitHub called Blog_mini, I still forsaked the plan, as I just don’t prefer to do too much programming this time, even I merely need to make modification on finished product. In addition, since the website using flask will be based on a database. When it comes to deployment, it will cost a bit. In that way, I dropped my plan about dynamic ones, although it would be a perfect opportunity to show off.
The only option for me, then, is static website. I would definitely NOT code one from scratch, so I needed to choose a pre-built tool to help me generate one. Compared to other pre-built generators, Hexo has a good community eco-system, making its customization effective. Alongside its aptness to deploy and intergation with git for version control, this becomes an ideal tool to keep my blogs.
1. Environment
Hexo requires Node.js and git. To install the prequisites and Hexo itself, the official document of Hexo has given detailed steps to follow along. Here is a copy from Documentation | Hexo.
Requirements
Installing Hexo is quite easy and only requires the following beforehand:
If your computer already has these, congratulations! You can skip to the Hexo installation step.
If not, please follow the following instructions to install all the requirements.
Install Git
- Windows: Download & install git.
- Mac: Install it with Homebrew, MacPorts or installer.
- Linux (Ubuntu, Debian):
sudo apt-get install git-core - Linux (Fedora, Red Hat, CentOS):
sudo yum install git-core
For Mac users
You may encounter some problems when compiling. Please install Xcode from App Store first. After Xcode is installed, open Xcode and go to Preferences -> Download -> Command Line Tools -> Install to install command line tools.
Install Node.js
Node.js provides official installer for most platforms.
Alternative installation methods:
- Windows: Install it with nvs (recommended) or nvm.
- Mac: Install it with Homebrew or MacPorts.
- Linux (DEB/RPM-based): Install it with NodeSource.
- Others: Install it through respective package manager. Refer to the guide provided by Node.js.
nvs is also recommended for Mac and Linux to avoid possible permission issue.
Windows
If you use the official installer, make sure Add to PATH is checked (it’s checked by default).
Mac / Linux
If you encounter
EACCESpermission error when trying to install Hexo, please follow the workaround provided by npmjs; overriding with root/sudo is highly discouraged.
Linux
If you installed Node.js using Snap, you may need to manually run
npm installin the target folder when initializing a blog.
Install Hexo
Once all the requirements are installed, you can install Hexo with npm:
1 | <span>$ npm install -g hexo-cli</span><br> |
Advanced installation and usage
Advanced users may prefer to install and use hexo package instead.
1 | <span>$ npm install hexo</span><br> |
Once installed, you can run Hexo in two ways:
npx hexo <command>- Linux users can set relative path of
node_modules/folder:
1 | <span><span>echo</span> <span>'PATH="$PATH:./node_modules/.bin"'</span> >> ~/.profile</span><br> |
then run Hexo using hexo <command>
Required Node.js version
If you are stuck with older Node.js, you can consider installing a past version of Hexo.
Please note we do not provide bugfixes to past versions of Hexo.
We highly recommend to always install the latest version of Hexo and the recommended version of Node.js, whenever possible.
| Hexo version | Minimum (Node.js version) | Less than (Node.js version) |
|---|---|---|
| 7.0+ | 14.0.0 | latest |
| 6.2+ | 12.13.0 | latest |
| 6.0+ | 12.13.0 | 18.5.0 |
| 5.0+ | 10.13.0 | 12.0.0 |
| 4.1 - 4.2 | 8.10 | 10.0.0 |
| 4.0 | 8.6 | 8.10.0 |
| 3.3 - 3.9 | 6.9 | 8.0.0 |
| 3.2 - 3.3 | 0.12 | unknown |
| 3.0 - 3.1 | 0.10 or iojs | unknown |
| 0.0.1 - 2.8 | 0.10 | unknown |
| (End of copy) |
2. Build Respository
Select a folder for your Hexo project. It is recommended that the path of the folder does not contain characters other than English. Run these command to initilize Hexo.
1 | hexo init <folder> |
To test the initilization, use:
1 | hexo s |
This will print out something like:
1 | INFO Validating config |
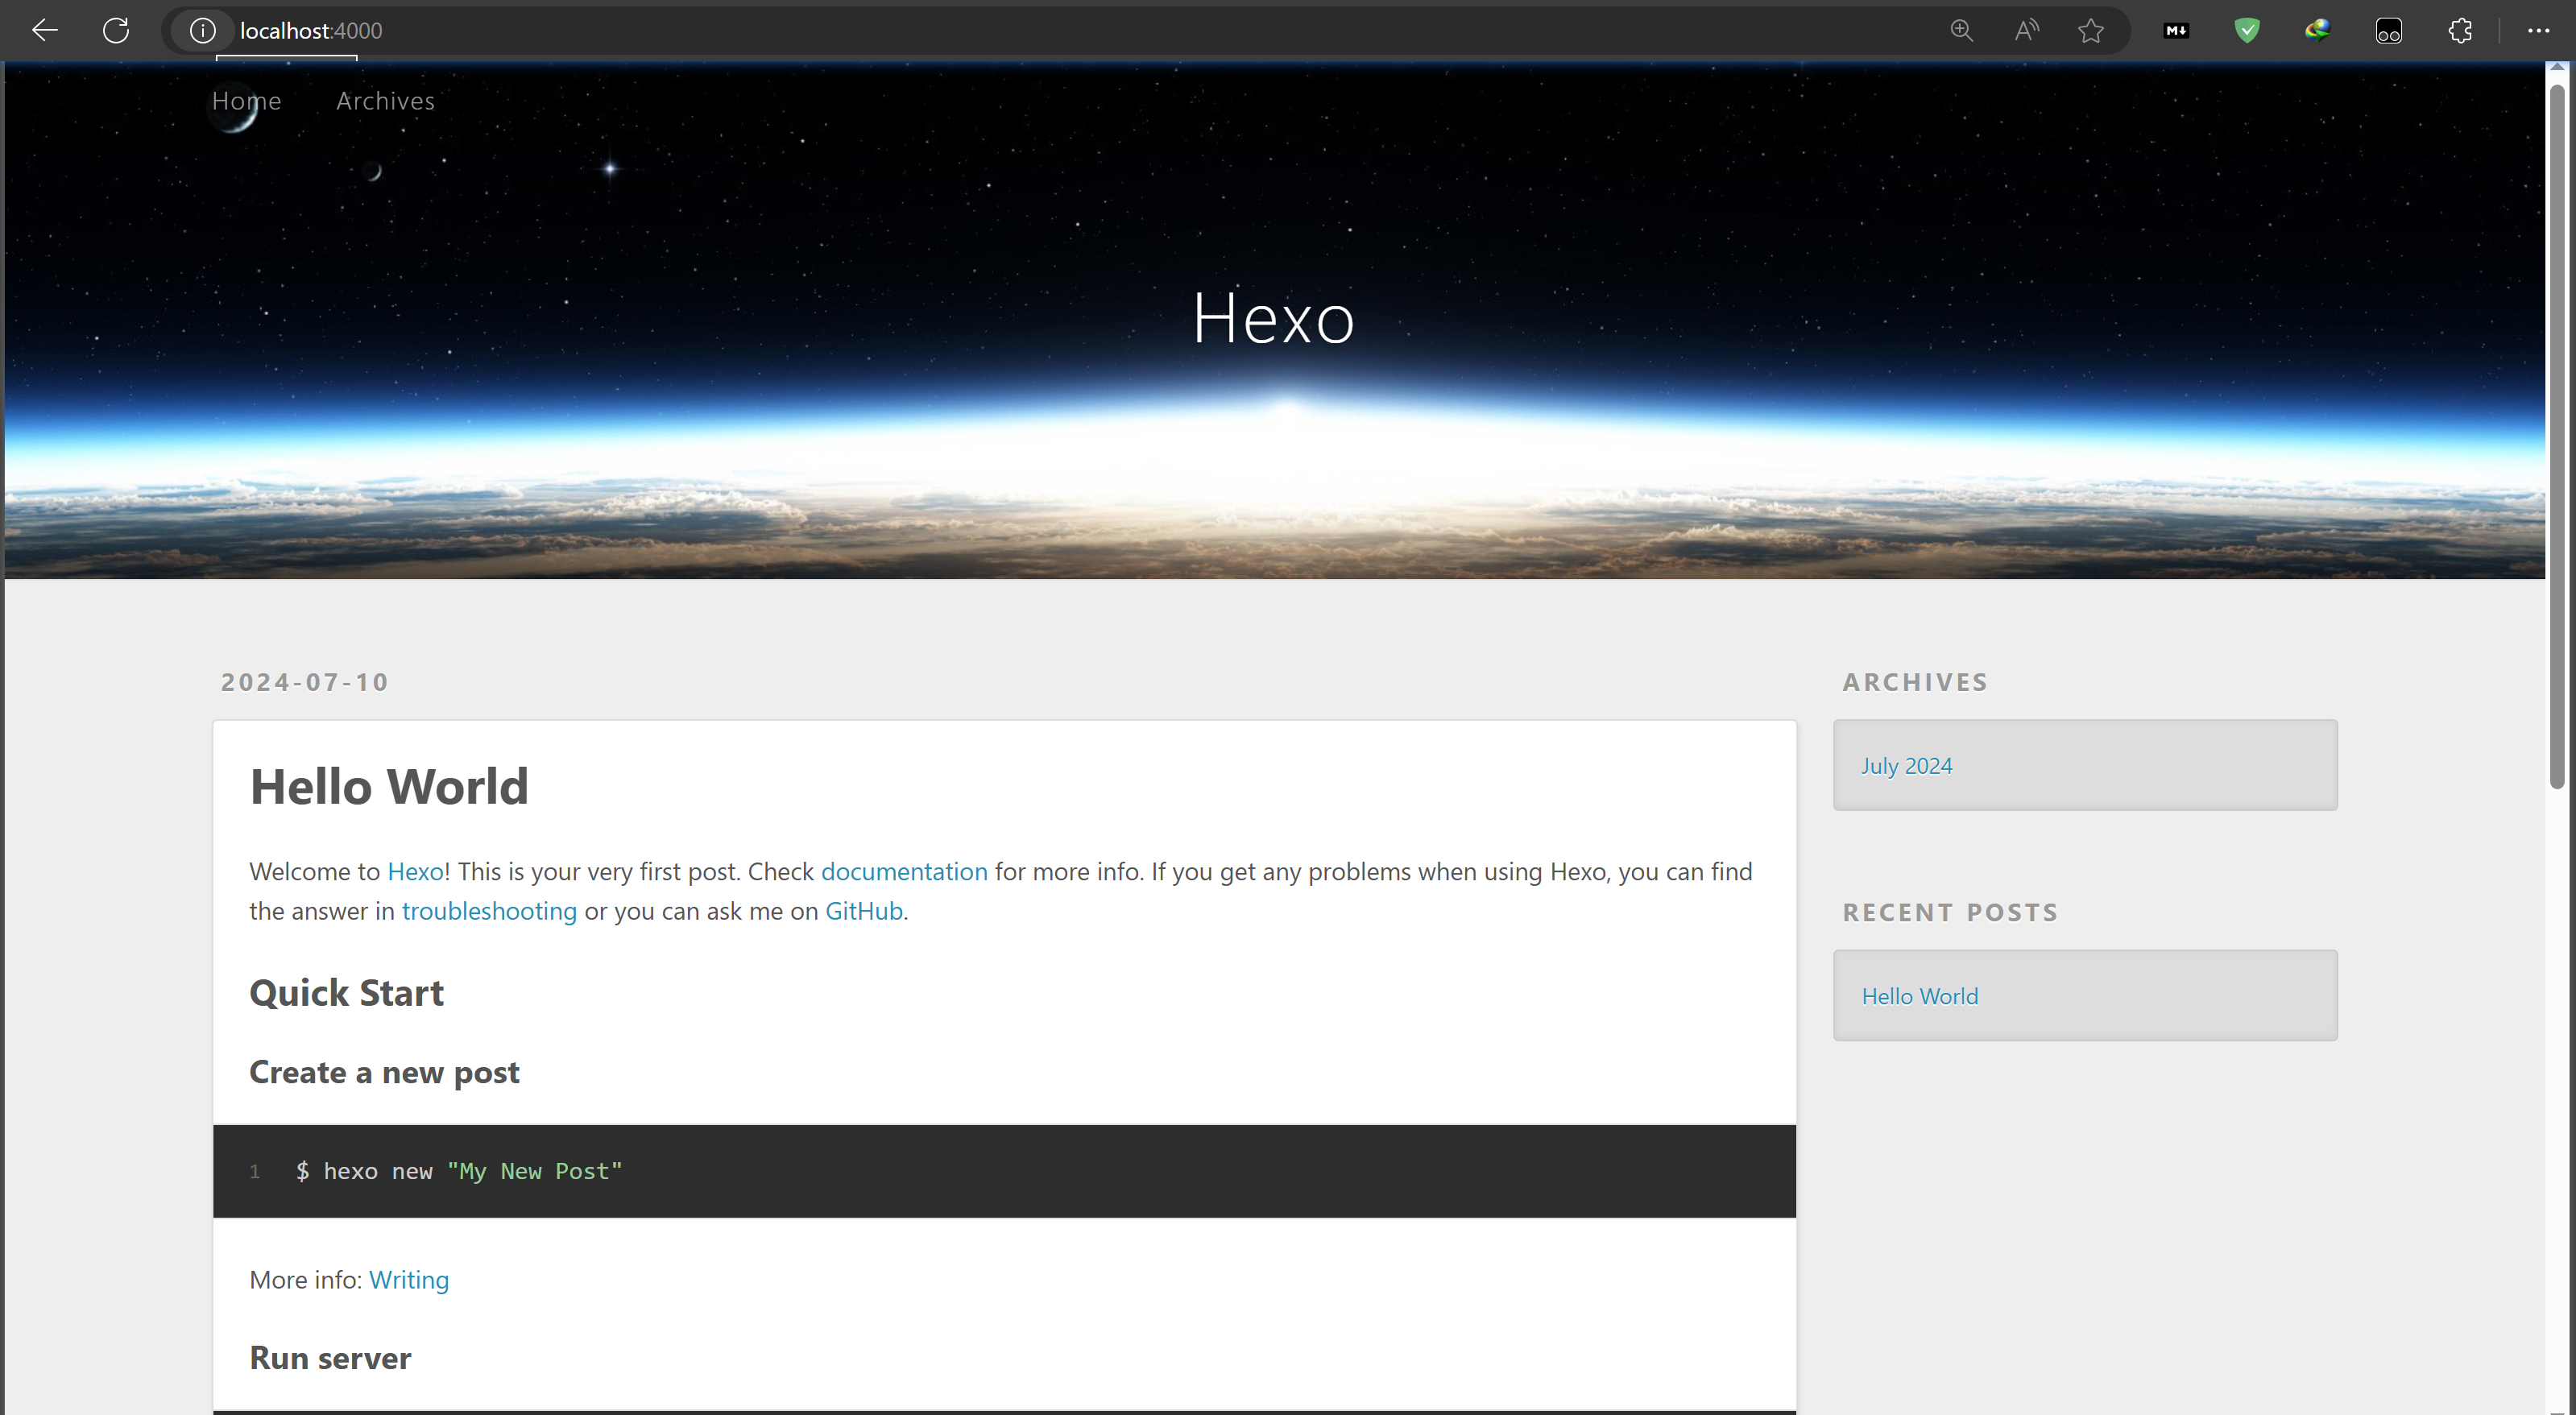
And the http://localhost:4000/ will look like:
If you see those, it means your initialization is successful.
3. Put into use
/or\means the root directory of your Hexo project
New Post
If you want to write a new post, type in the terminal:
1 | hexo new post '<post title>' |
Hexo will create a Markdown file as your post file in the \source\_posts\<post title>.md. Edit this markdown file to modify your blog content.
Front Matter
In your newly created blog, titled a, for example, you will find this at the start of the file:
1 |
|
This is called Front Matter in Hexo, a yaml config header. As you can see, this header contains meta-data of your blog, like the title, date, and tags. The basic idea of yaml is to use a key: value to let Hexo get these information. There are also other options which you can find in official document Front-matter. In this example, I used categories. To use multiple value for one key, the format is key: [value1, value2, etc.]. In that way, my Front Matter will look like this:
1 |
|
After this Front Matter, you can write your content happily in Markdown now. However, if I need to add the categories every time I create a post, I will go crazy. To avoid that we should apply Scaffolds.
Scaffolds
This time the official document works, here is a copy:
When creating posts, Hexo will build files based on the corresponding file in scaffolds folder. For example:
1 | hexo new photo "My Gallery" |
When you run this command, Hexo will try to find photo.md in the scaffolds folder and build the post based on it.
(End of copy)
For example, you created a.md in \scaffolds\ based on post.md:
1 |
|
Then you can type hexo new a '1' to create a blog titled ‘1’, with categories in the front matter.
Modify post
Just edit the markdown file will work.
Generate your site
Very simple:
1 | hexo g |
All the source files are in the /public/. They can be used to deploy on other servers.
4. Customization
If you want to go further by customizing your site, you will need to configure your theme.
Basic Configuration
The basic meta-data of your blog, like authorship, title, description, etc. is configured in the /_config.yml. Simply follow the comments wrote in the file to add on your information. Part of my site configuration:
1 | title: Less is More |
Install Themes
Explore your theme here: Themes | Hexo
In this Re blog, I will use NexT as example.
First, get into its document website: Getting Started | NexT (theme-next.js.org)
Follow its tutorial to install the theme. If you encounter any problem, turn down your VPN completely.
1 | cd hexo-site # your project folder |
In the /_config.yml, search for theme, and change the its value to next (your theme’s name):
1 | theme: next |
Copy the content of /themes/next/_config.yml to a new file /_config.next.yml. If it is other theme, the new file’s name should be _config.<theme name>.yml.This is the file where you can configure your theme.
Configure your Theme
Basically, you just need to follow the comments in the /_config.next.yaml to edit the configuration. If you are looking for a specific setting, just search the keyword in the file, and you will locate the related key. For example, you want to enable dark mode. Search for dark, you will locate the line:
1 | darkmode: true # change this to false to disable darkmode |
There is just a few things that the comment does not state clearly. Here is the explanation for these parts:
Customize Menu
If you want to add your own options under the main menu, add the following code under the menu section in /_config.next.yaml:
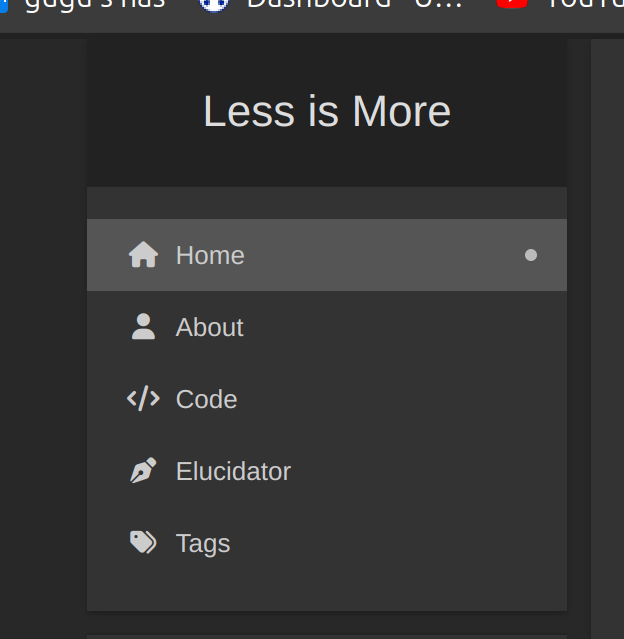
1 | home: / || fa fa-home |
This will add two options linking to the category code or thought. The code after || is the name of icon from Font Awesome. Copy its code similar to the format as the example provided in the /_config.next.yaml.

By adding these code, my menu became:

5. Deployment
Host
There are several ways to host Hexo pages. There are mainly three ways:
- Host on GitHub (for free)
- Host on an object storage bucket (cost nearly none)
- Host on a server (cost)
Personally, I prefer the second option, as it has much fun. The first option has already lots of tutorials on the Internet, search them yourself.
Most of the object storage platforms, like Google, Tencent, etc., support to host static website on it. I used Tencent, because it is cheap and easy. This bucket costs based on network flowing out of the bucket. 1 GB of network costs
All the buckets are the same to setup the bucket:
- When choosing region of the bucket, just not choose area in mainland China, so that you can skip filing
which is shitin order to get an SSL certificate. The region should be near your location to guarantee the speed. - set the permissions of all users to be able to view the content of file. Read only!
- upload all the files in the
/public/folder. Make sure the root directory of your bucket does not containpublicfolder, but the content in it(you know what I mean). - see the url of your bucket, then access this url on your browser. You should be able to see your landing page.
After modifying your website locally, do the following actions to update the bucket remotely:
- run
hexo g - sync local
publicfolder and remote root directory - your website is then up-to-date
Domain (Optional)
Register
There are many popular platforms to register domain, like Google Cloud, GoDaddy, Cloudflare, Tencent, etc. The prize varies a lot, and I suggest you can try platform in China, because they are much cheaper. I purchased a domain gu33gu.asia for only 6 RMB (0.9 US$) for the first year. The regular prize for a year is 30 RMB (4.2 US$). That is totally acceptable.
Add record
To let the domain function, you have to add record to trace your bucket’s IP. Most bucket platform will provide its own domain, so you just add a CNAME record with the value of the provided domain. For example:
1 | type: CNAME |
After the record takes effect(usually after the TTL time), you should be able to access through your custom domain. For example, my domain is gu33gu.asia, with the record’s name blog, I am able to access my blog at blog.gu33gu.asia.
Cloudflare (Optional)
Using Cloudflare provides free SSL and protection against ddos attack(this usually won’t happen). In addition, its DNS is free.
Register an account on Cloudflare, and follow its guidance to add Cloudflare as the DNS server.
SSL (Optional)
Other ways to apply SSL for your domain for free other than Cloudflare, you can try Tencent free certificate. The certificate can endure 3 months. After it expires, you need to register one again. Follow its guidance will do.
6. Image Hosting (Optional)
Usually your blogs contain image. Hexo recommends remote URL. You can either use a third-party image hosting platform, or build your own. I built my own using a object bucket.
Create a folder on the root directory of your bucket called _resources. You should be able to access the content within using direct URL. Upload your pictures to this folder, and format all the URL in your markdown blogs.
To format them automatically, I wrote a script to help me(imageFormat.js):
1 | const fs = require('fs'); |
Modify accordingly in reference to the comments, especially the newRootDir and imgRegex.
Put this script under the directory with your blogs (_posts folder), and use node imageFormat.js to run it. This will automatically format the image URL of all the markdown files under the same directory.
7. END?
I have just built a personal blog, a new body without an interesting soul. To inject soul into this meaningless body to make it of significance, I need to keep adding content into it. Building a blog is just the beginning. Keep updating it to achieve eminence.
问渠那得清如许?为有源头活水来。 ——朱熹《观书有感》