How to install Python in a professional way
In every tutorial, first read to the end, and then operate.
watch this video(not original):
- Windows Anaconda and Visual Studio Code Setup (youtube.com)
- Mac ANACONDA Tutorial for Python | How to Install Anaconda on Mac OS and How to use Anaconda for Python (youtube.com)
Or you use this tutorial(original work) to download Anaconda and VScode(or Pycharm).
0. Why Anaconda (reason of using virtual env)
When you have multiple projects, and they requires different version of one package, then you will meet trouble if you don’t use virtual env. Also, it is a good way for you to select a suitable Python version(some packages can only run on 3.7, while others can only run on 3.11, for example).
When you are reading instructions, make sure read to the end first, then operate on your machine.
1. Install Anaconda
https://www.anaconda.com/download/
download it, and run .exe or whatever.
Verify your installation
If you are Windows, open ‘Anaconda Prompt’ in your program list; if you are Mac, open Terminal.
You should see sth. like this: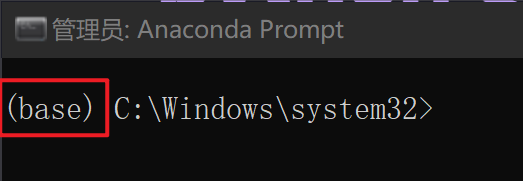
2. Install Python (Virtual Environment)
type in your anaconda terminal:conda create -n your_env_name python=x.x
your_env_name is your virtual environment’s name, while x.x is the version of Python. Usually, we use 3.11
3. How to use
type in conda activate your_env_name to activate your environment
type conda deactive to quit environment
Settings in VScode or Pycharm
VScode normally would scan your disk to find Python, but sometimes things can go wrong.
VScode
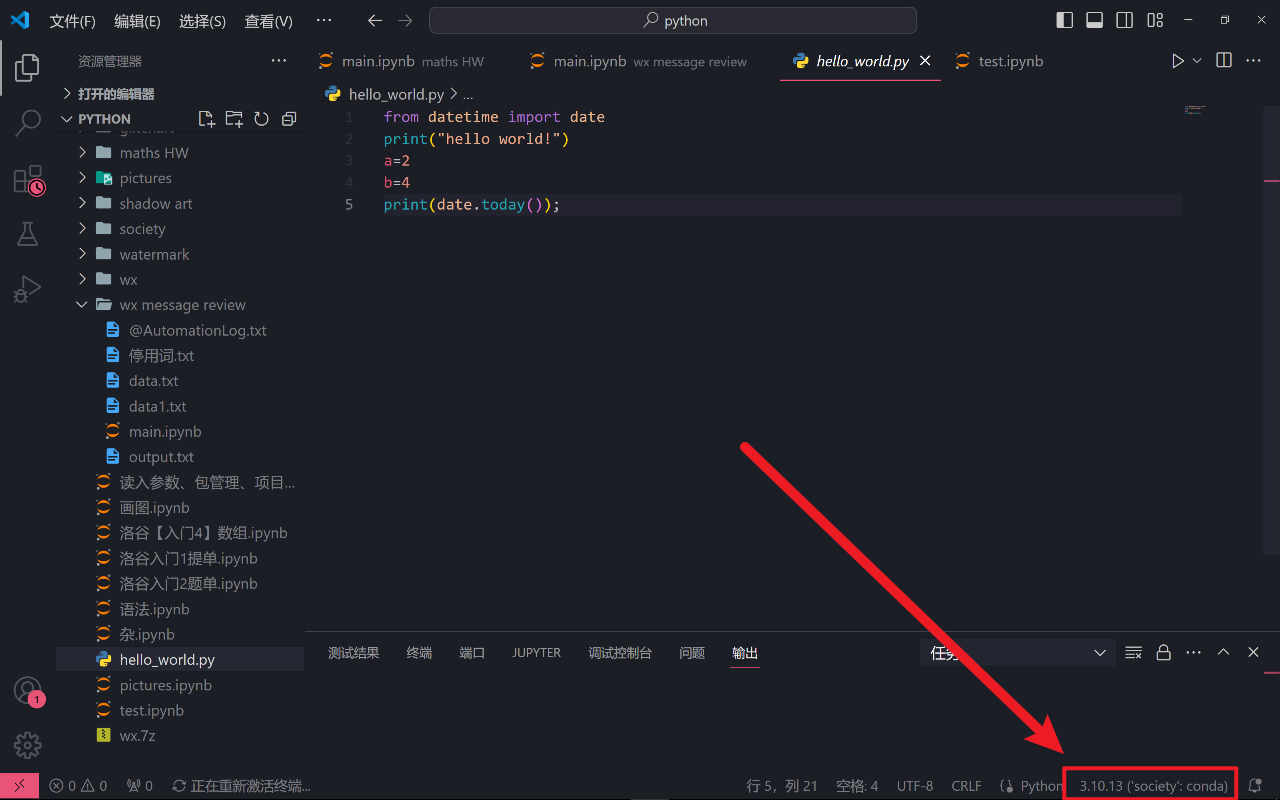
Click on that red box position, and you will see: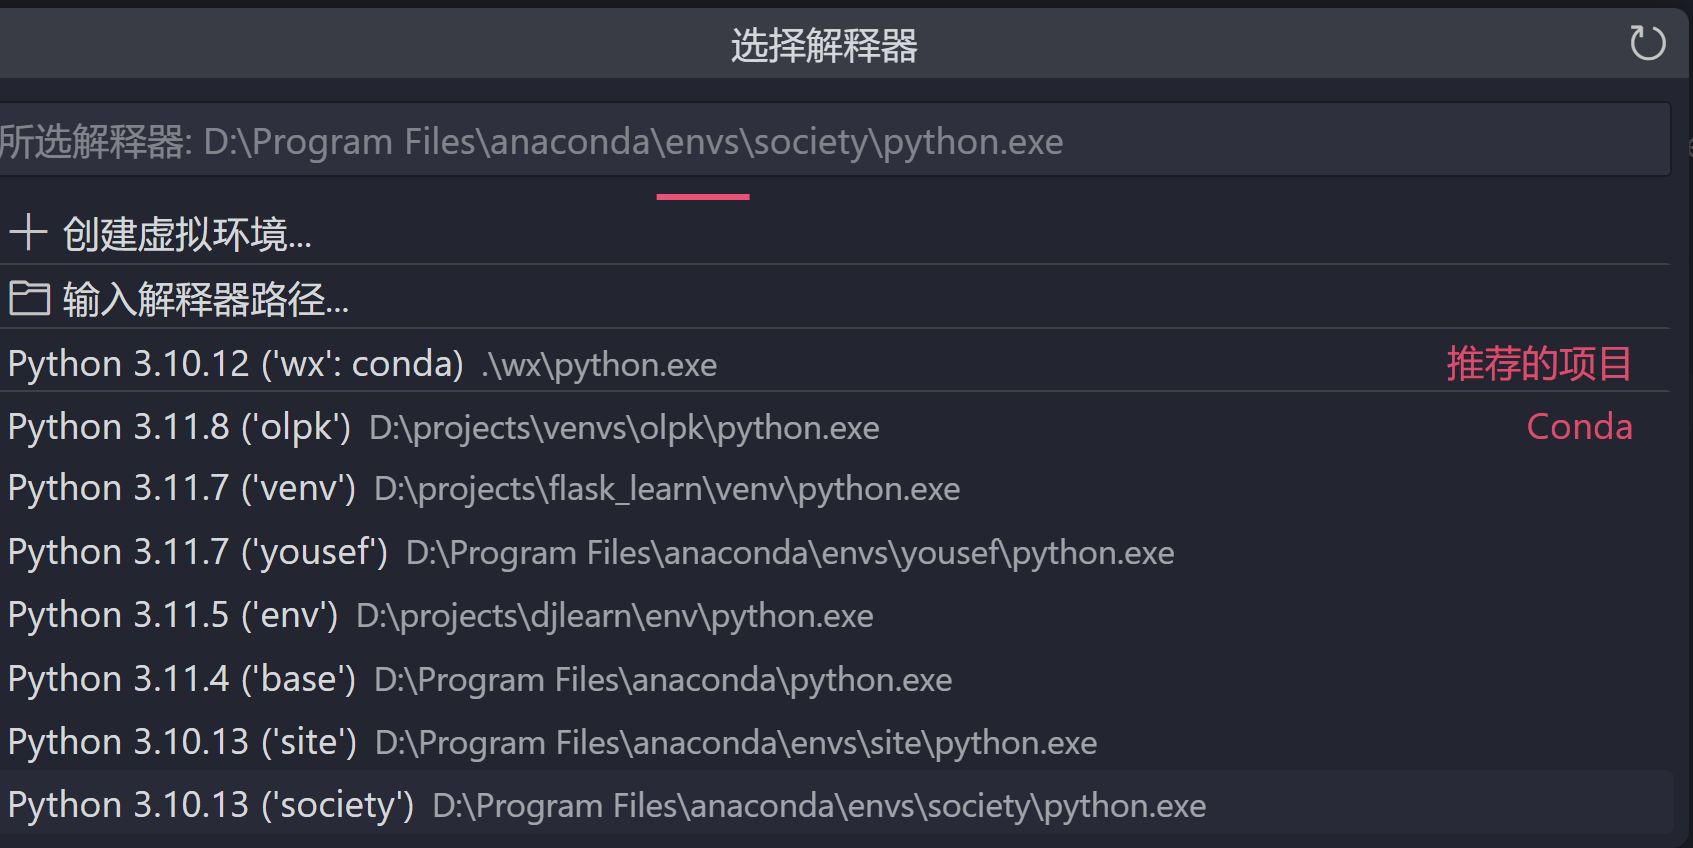
Then you select your environment(your env name would be in ‘’)
If you cannot find it, type in the absolute route(full route) of your Python.exe(Windows) or Python(Mac). (Usually this won’t happen)
When using Jupyter Notebook, simply click: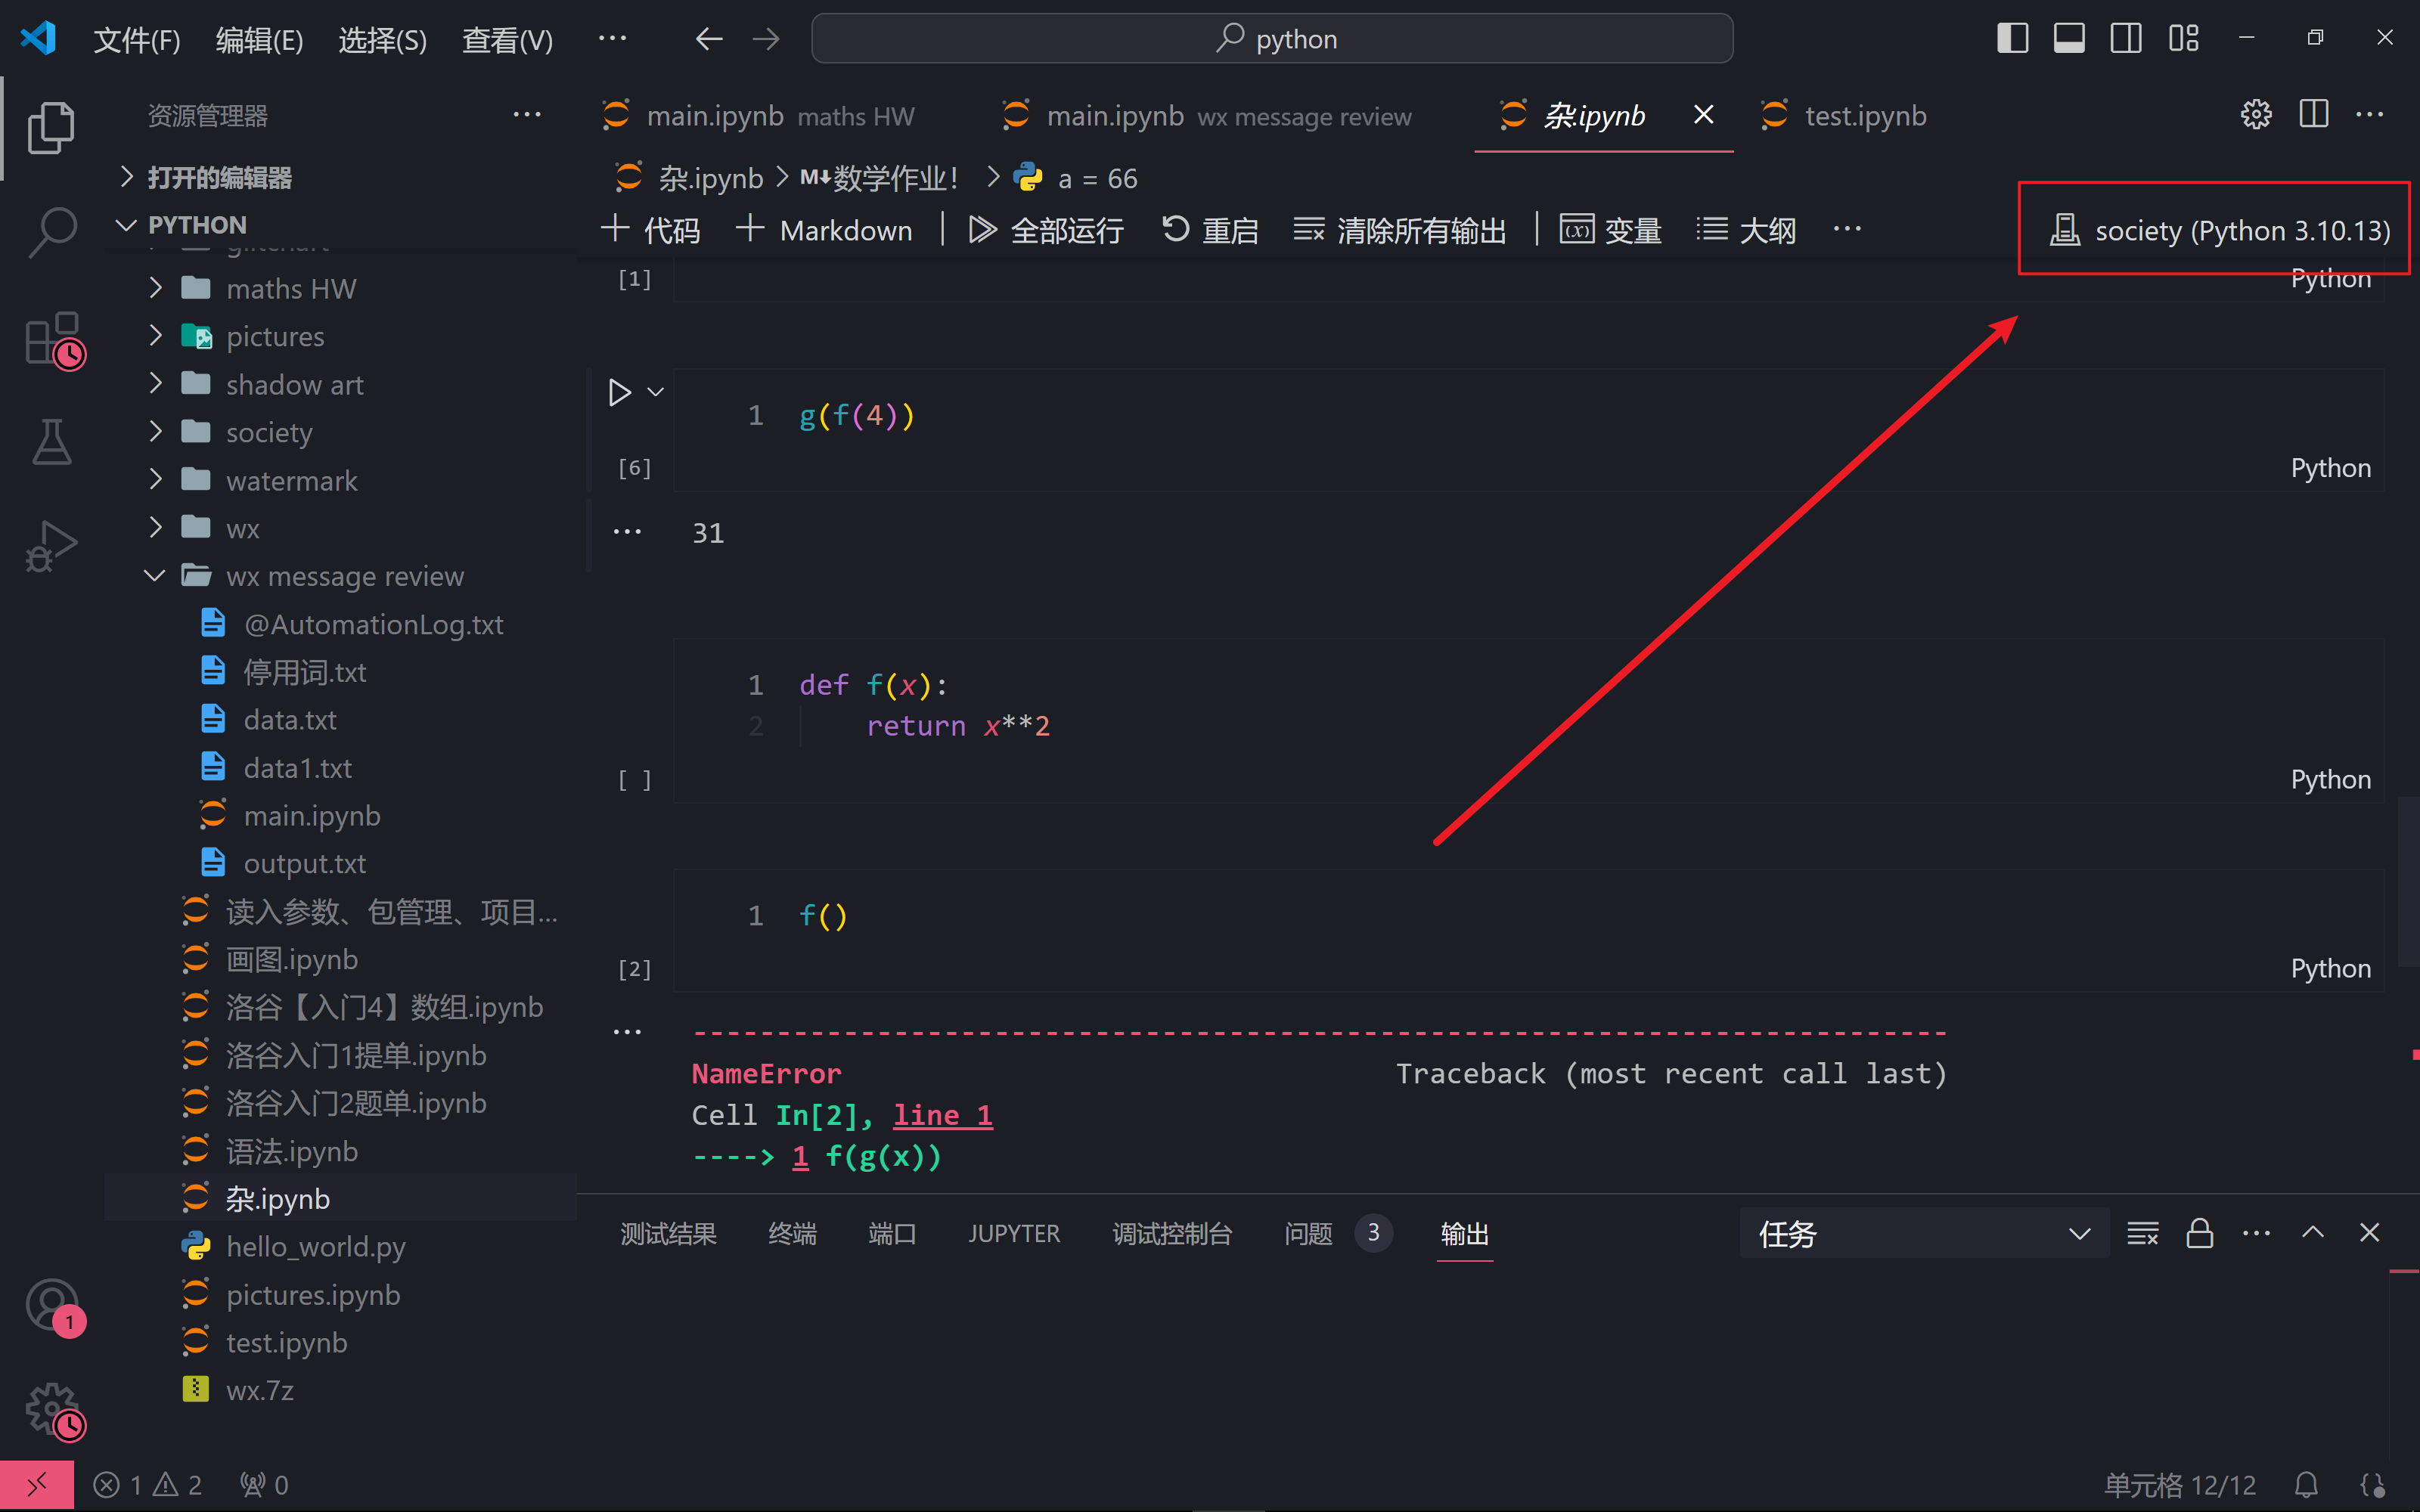
Then you follow its instruction to find your environment.
Pycharm
Quite similar to VScode, click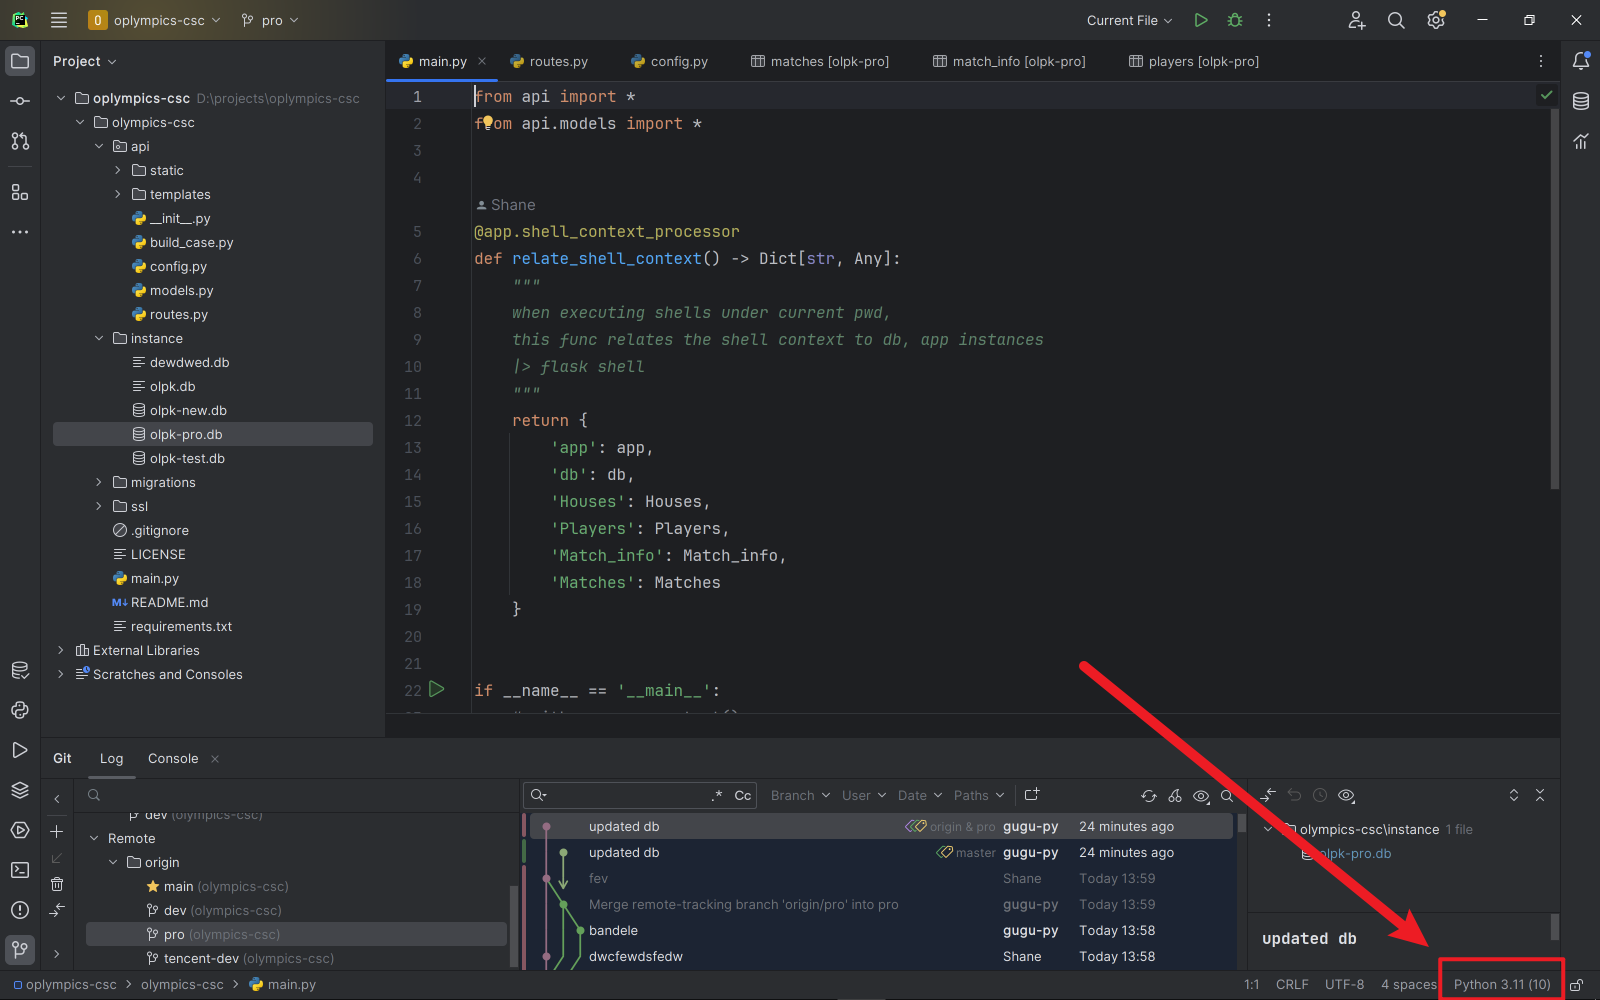
Then select ‘Add New Interpreter’ -> ‘Add local Interpreter’ -> ‘system Interpreter’ -> click on ‘…’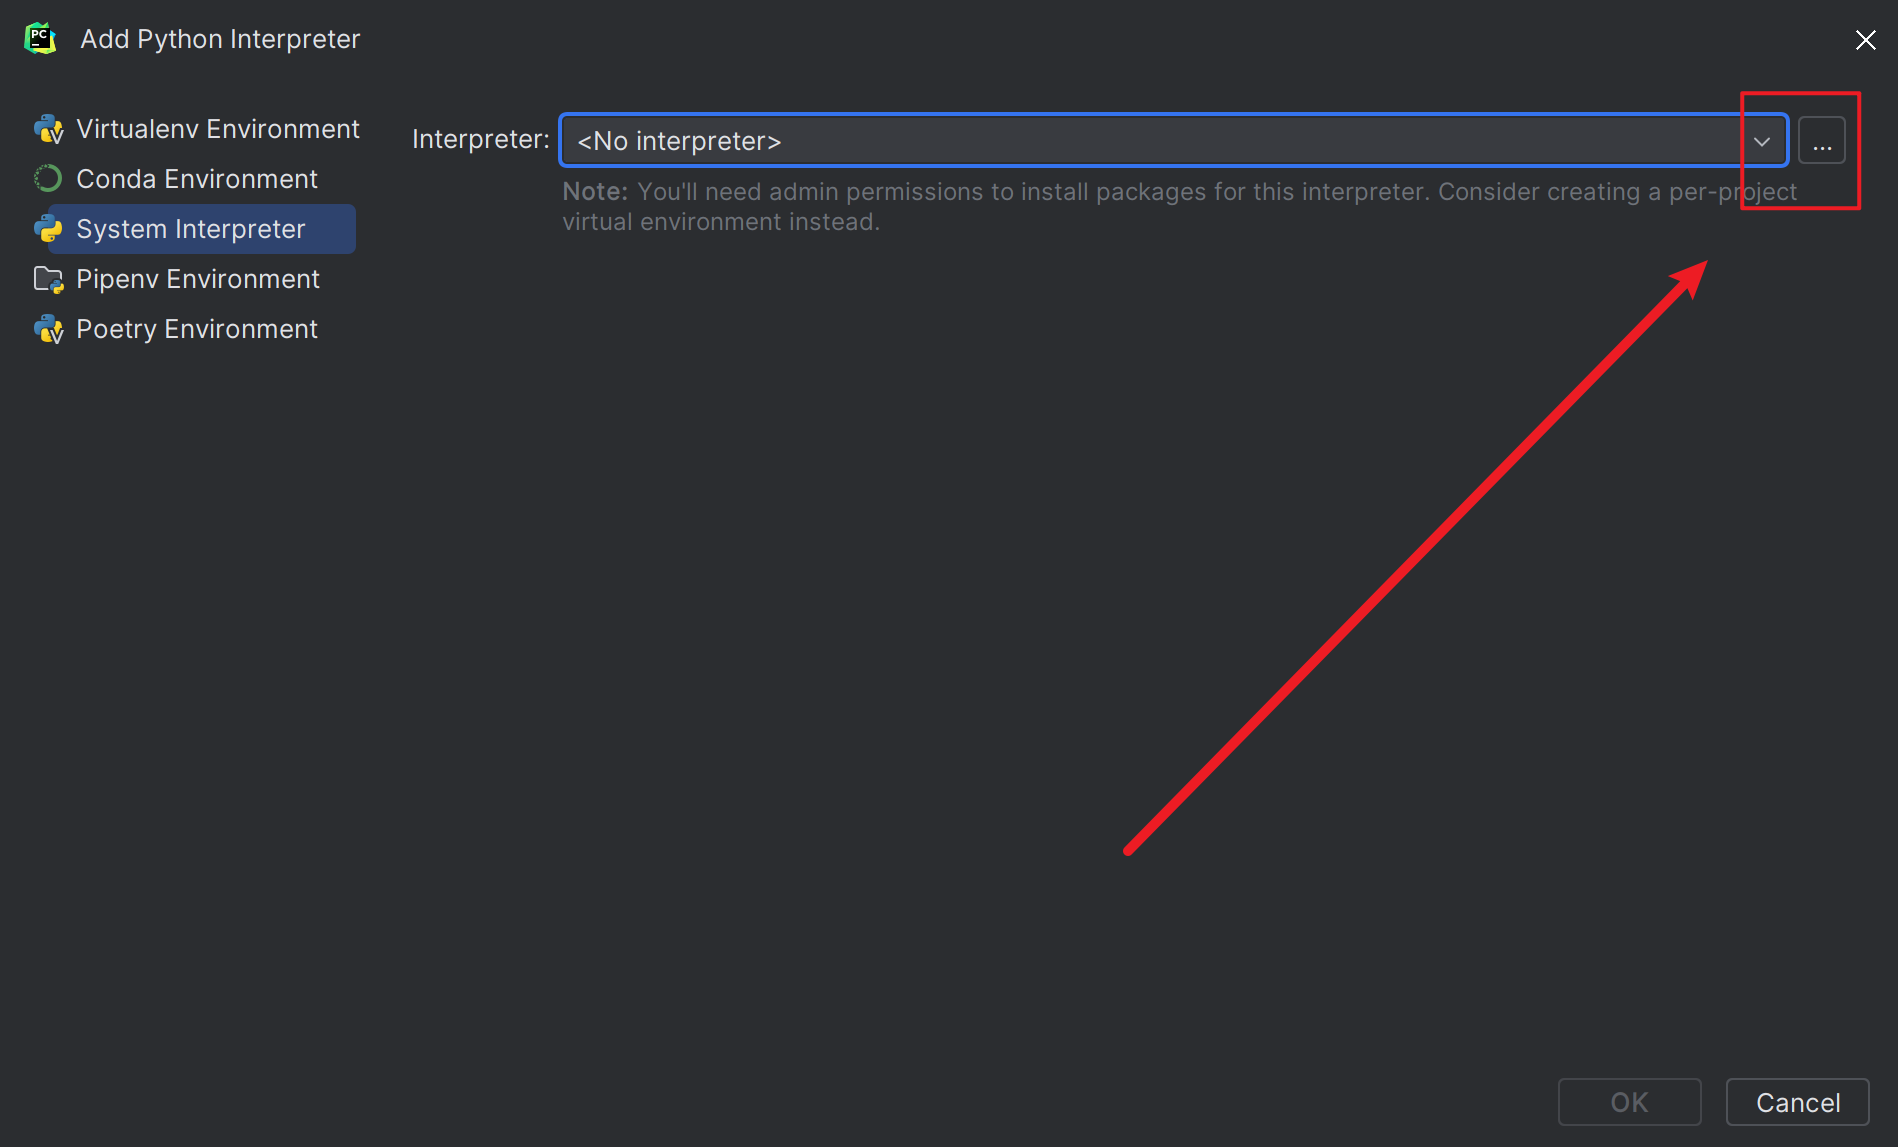
Select your Python.exe(Windows) or Python(Mac)
4. Done
It is easy, is it not?